Animation Secret: Walks Simplified

Walks. They are a constant focus for we animators. A never ending quest to innovate, express, and sometimes just get to look right. Walks are some of the toughest challenges in animation, but often (as animators tend to do on occasion) we over think things. Truthfully to start a great walk all you need are four great frames. Just four drawings/poses, and you’re well on your way!
Let’s start at the beginning (a very good place to start). When you boil a walk down to its essence, what you are doing is falling and catching yourself. Gravity is trying to pull you into the ground, and you’re fighting it for a brief moment (while your foot is up) before giving in as you move forward. This is a VERY important concept to grasp. The biggest issue that crops up in a “bad walk” is a lack of weight. Remember: It’s a controlled fall. Your character is fighting constant gravity and recovering with each step. Use that knowledge when you’re planning your poses. Feel that weight.
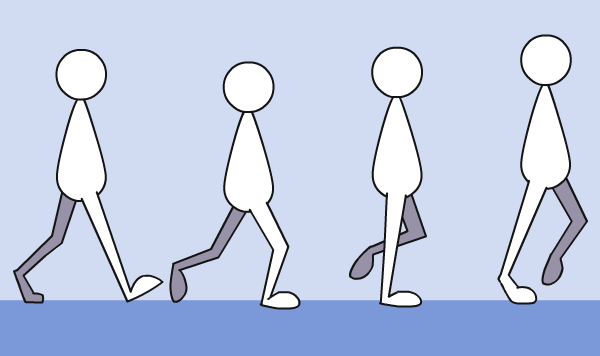
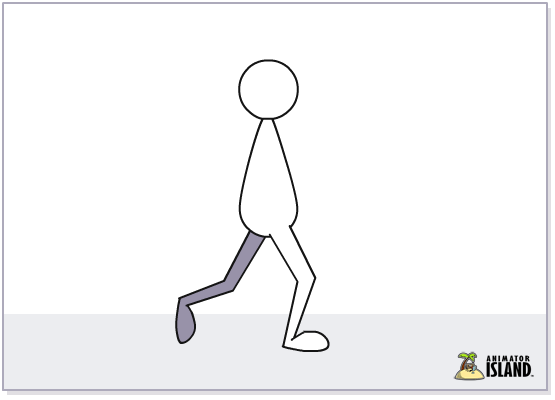
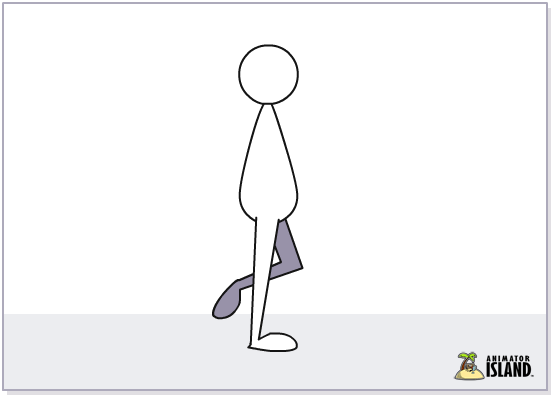
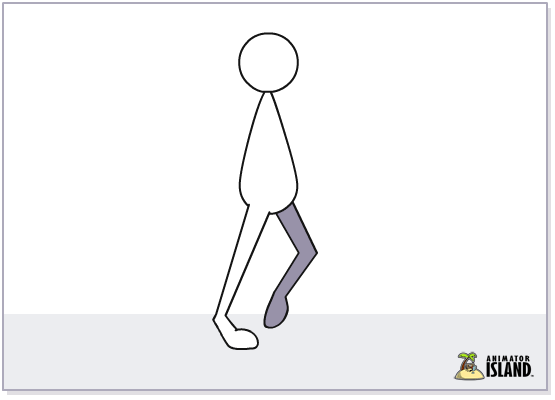
When you’re starting your walk, there are only four poses that you need to worry about. It’s that simple.

You’ll notice that there aren’t arms on these poses either. We aren’t worried about arms right now, we’re worried about weight, balance, and feel. If you take away nothing else from this Animation Secret, let it be this: Use very loose shapes and FEEL for keyframes. You can always go back over what you do here, but the bones need to be right. Draw/pose the HEART. The ESSENCE.


That’s it, you’re done! (Well, almost.)
Once you have these four poses in place it’s just a matter of repeating once for the other leg and then filling in the in-betweens! Of course, it still takes a lot to infuse your walks with personality and character, but by mastering the simplified basics you’ll have a firm foundation to build on. Remember to feel the weight in a walk – that’s essential!
Stay tuned to Animator Island for articles on adding arms to the simplified walk and more, coming in future updates! Want to be sure you don’t miss one when it hits? Follow us on Twitter for all the latest animation tips and more.


Walks are way harder that this makes it seem, I can’t believe it would be THAT simple. I’ve been animating for like 3 years and I still have trouble with them. What about all the stuff that comes in between? You just leave that part out?
Of course walks are more complex. This article is just an outline of the four basic events which happen in most walks (that are close to a real life walk). The difficult part is to get the timing, the character’s attitude (which is a totally different topic) and the weight right. And depending on your timing you need a lot more frames than that. But it really helps a lot if you plan with those four stages, because they are the most distinctive elements of all (semi-)realistic walks!
It seems like the attitude is so much more important tho. The walk shouldn’t be like real life walks because it’s a cartoon! Unless you’re doing CG for film or whatever. It’s a cartoon it should be a cartoon walk.
I tried this out in flash and it actually looked pretty good just with the four frames alone without my adding any more! well I did the other side too, withthe other leg forward. Anyway thanks for making it simple because I always try walks but something gets messed up and it doesn’t work right. One thing though how do I line up the background so it goes at the same speed as the walking character?
In general you should avoid animating loops in place. It is difficult to get the weight and everything right while you slide the character. If you really have to animate him in place, you could place a cobble stone or something in the background directly under the characters foot as soon as it touches the ground… Now this cobble stone has to slide along with that foot until he lifts his leg. If you tween the background accordingly you have the background speed!
Agreed! Sometimes walk cycle loops have to be done for budget/time reasons, but your best bet is always to make each performance unique. Also keep in mind that if you’re working in Flash, you can remove the “cobblestone” or whatever marker you choose AFTER you get the background speed correct. I myself often use bright green lines as markers while animating, and remove them afterward. The lime green makes it easy to see and remember to remove at the end!
But what goes in the middle parts?!
What do you mean? Between the frames that are discussed in the article?
Between each of the frames show you would simply in-between. The trick, of course, is to do so with gentle arcs and nice movements. Perhaps we’ll cover more about walks in a future article, if you’d like!
Could you do a tutorial on how to draw a forward walk please ^.^
I will try to add it to the ever growing lists of tutorials we’d like to make! 🙂 In the meantime I’d recommend you just give it a shot and see how it goes. You can also find some great information on walks in the Richard William’s book The Animator’s Survival Kit!